Tuesday, September 30, 2008

Cocoa-Roasted Chicken with Peanut Rice

I have recently discovered a love for Mole sauce. I have not yet attempted to make my own but I really want to. (if you have a recipe you like, please leave a comment or email me) Mole refers to a lot of things in Spanish and Mexican cooking, but I am talking about Mole Sauce, or Mole Poblano. To make a very long story short, the Mole sauce I love has a delicious subtle chocolate flavor to it that I adore. When I saw this recipe I knew I had to try it. (except for the bananas part, that is pretty much the only food I do not like!)


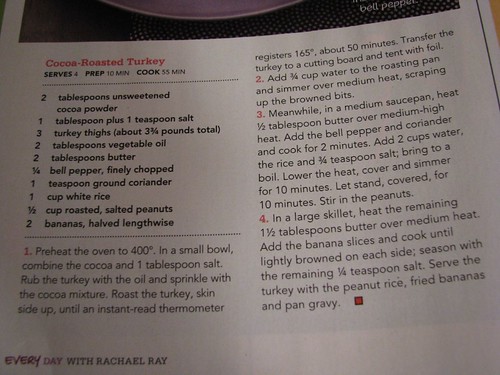
Do not be alarmed that I am rubbing chocolate all over some chicken. The recipe calls for unsweetened cocoa and I bet you that if I put a bite of this in your mouth and asked you what you tasted you would not even think cocoa or chocolate. It is just this subtle delicious flavor that is almost smoky, yet you can't quite place it. Now that I have you interested, lets get cooking! Preheat your oven to 400 degrees and lets start gathering some ingredients.


Cocoa, pepper and coriander.
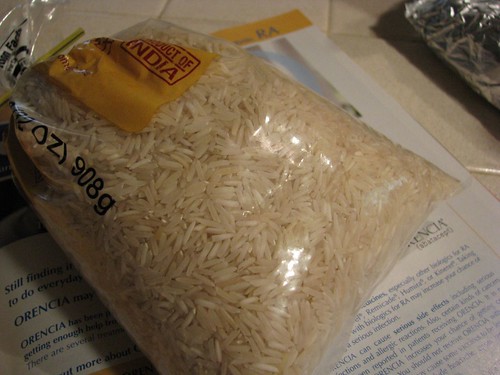
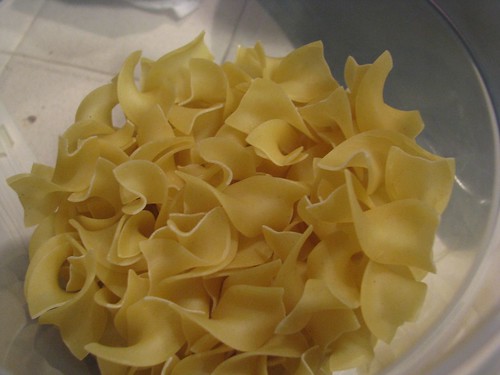
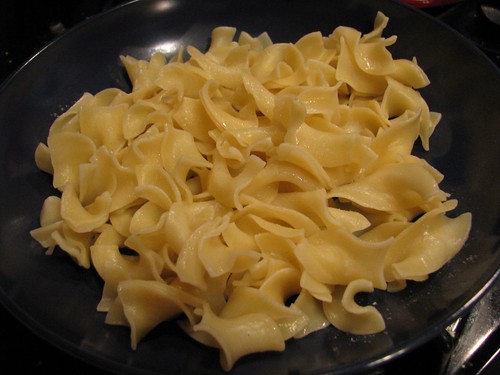


Rice.


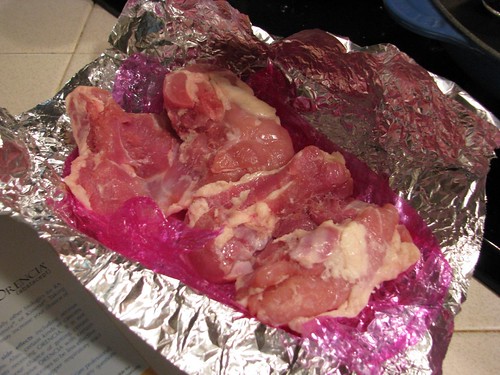
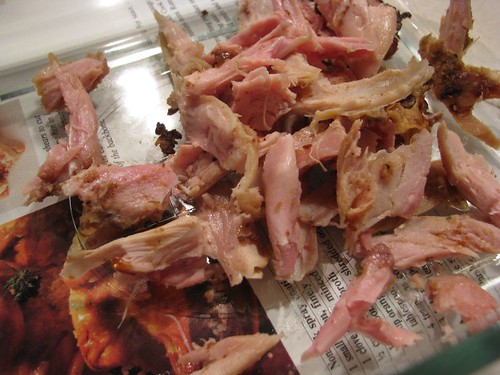
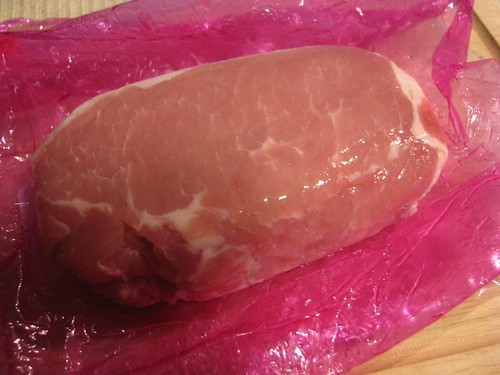
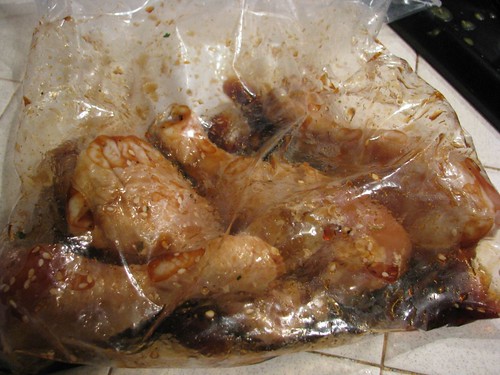
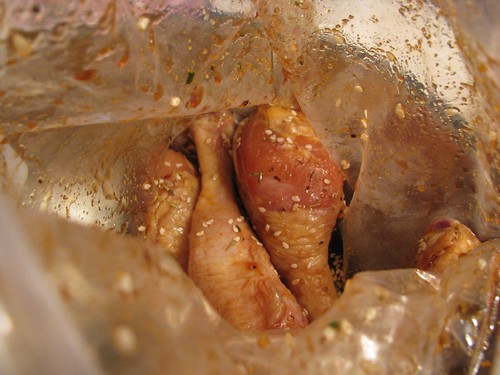
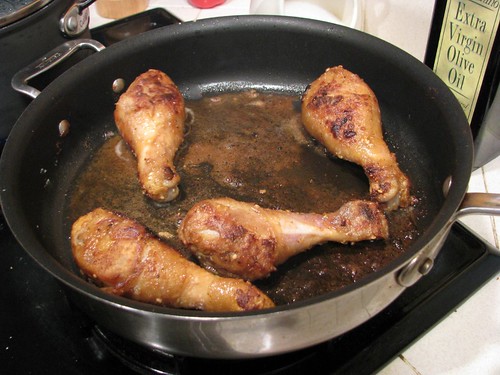
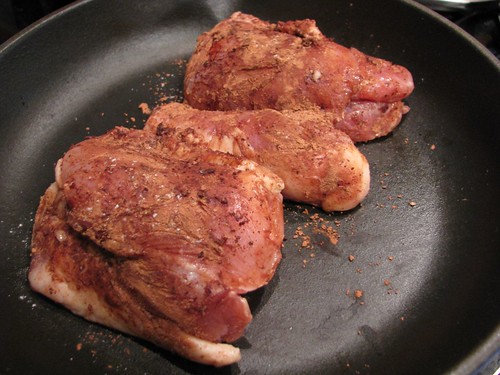
My chicken just waiting for a rub down. The recipe calls for turkey, but I used chicken thighs because I love them.


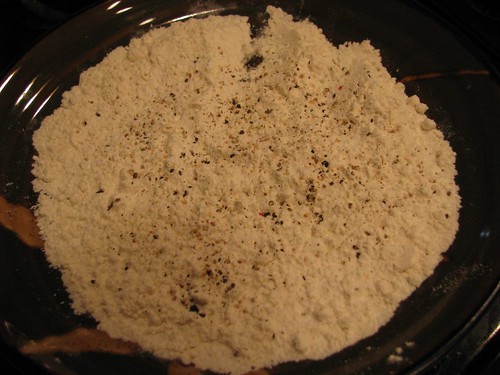
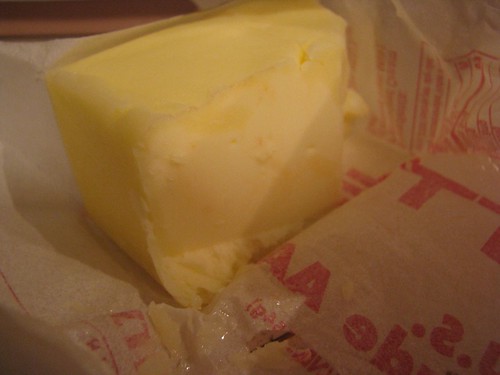
Here is the seasoning, so simple. Cocoa and salt!


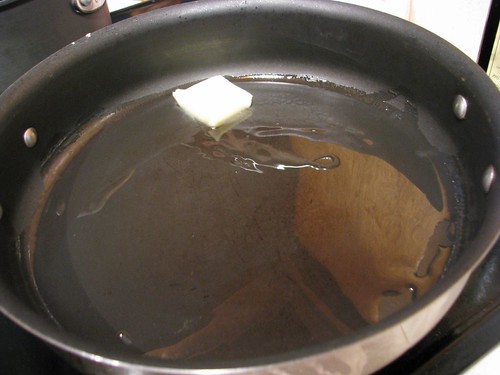
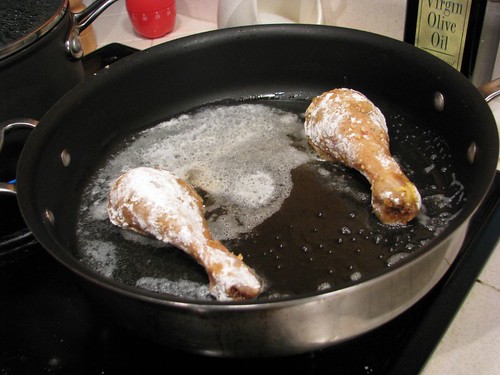
Get the chicken coated with the oil and seasoning and pop it in the oven for about 45 minutes. Use a pan that you can then heat on the stove top to make your sauce later.

While the chicken roasts, we need to prepare our rice.


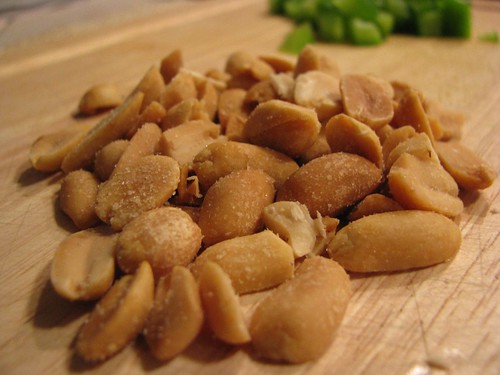
You need some peanuts.
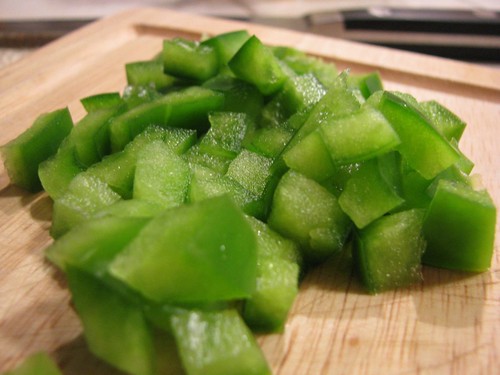


Some green pepper.


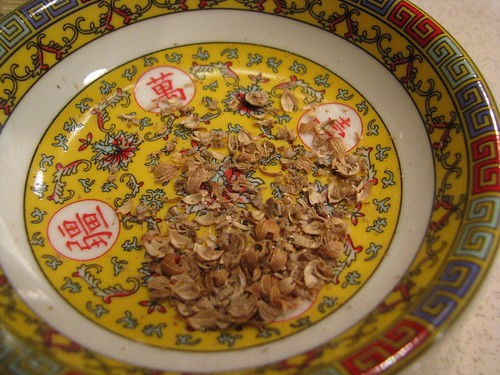
and some crushed up coriander.


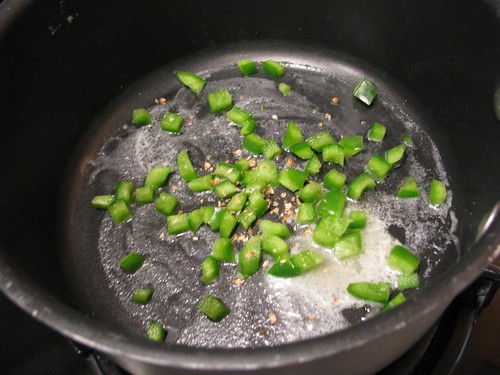
Cook up the coriander and green pepper in some butter for about 2 minutes.


Add in the rice and water and bring to a boil. Reduce the heat, pop on a lid, and let it simmer for about 10 minutes. Turn off the heat and let it hang out for another 10 minutes.


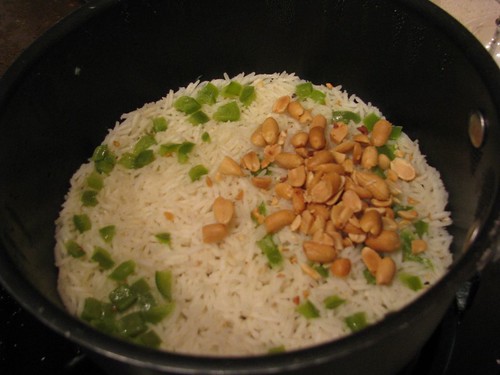
Once the time is up, stir in your peanuts and that side is ready to go.


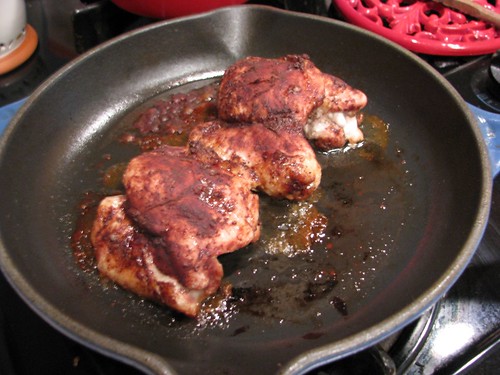
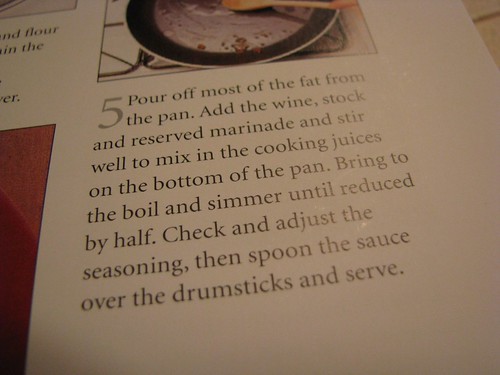
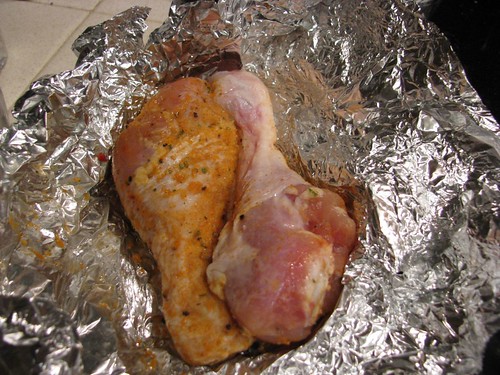
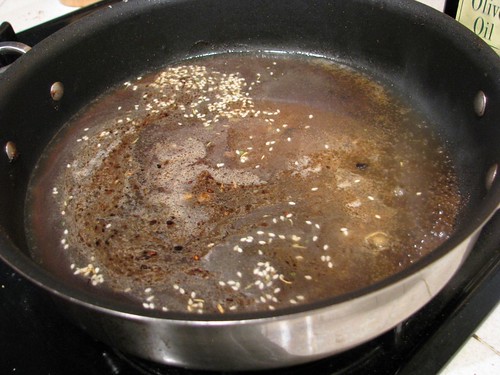
Look at that! When the chicken is cooked, remove the pan from the oven and place it on the stove.


Put the chicken in some foil and keep it nice and warm. Take your pan and put it over medium heat.


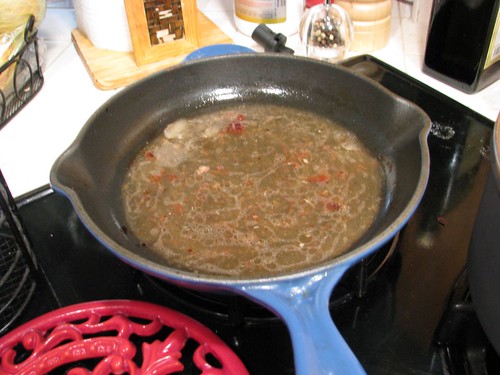
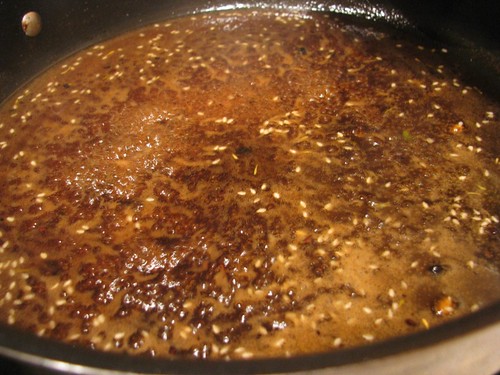
Add some water or chicken broth to the pan and scrape up all the yummy brown bits from the bottom. When this reduces you are ready to serve.


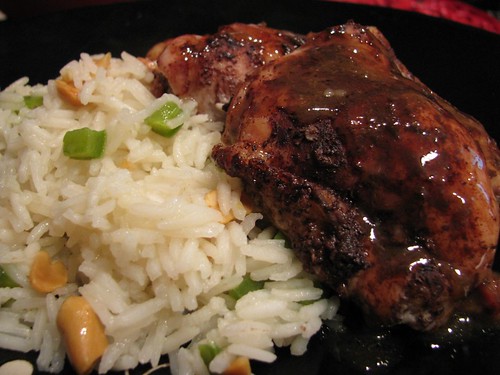
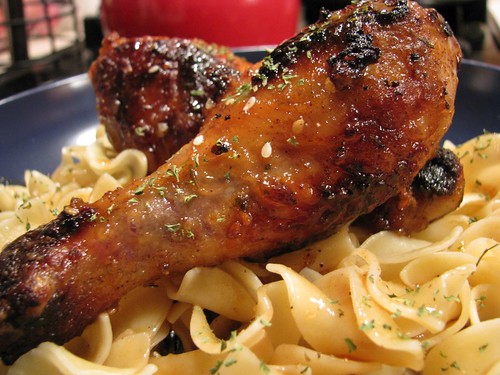
This was absolutely delicious and I cannot stress enough that this is not a chocolatey or sweet dish. It is savory and complex, but so easy to make.

Stumble Upon Toolbar

Monday, September 29, 2008

Creamy Chicken Broccoli Casserole

I love to try all sorts of new things like Elk, Ostrich and Bison, but every once in a while I crave a good old fashioned casserole with some Campbell's soup. This one is fast and easy and quite tasty.


The first thing you want to do is start some water boiling for your noodles and preheat your oven to 350 degrees. Next we gather our ingredients.


Grab some frozen broccoli.


A can of good old Campbell's soup.


My favorite, egg noodles.


Some cooked chicken. You can also used canned chicken or tuna fish.


Milk.


Delicious swiss cheese.


and some green onion.


get everything in a bowl and give it a stir. Let it hang out until your noodles are done.


Add them to the mixture with some salt and pepper and stir it up.


Pour it into the casserole dish and pop it into the oven for 40-45 minutes. Use this time to catch up on some relaxing as the prep for this took no time at all.


Sprinkle it with some paprika after you plate it up and you are ready to enjoy!!

Stumble Upon Toolbar

Saturday, September 27, 2008

Pork with Sauerkraut, Apples and Potatoes

Are you guys ready to fire up the oven, because I am. This meal is a low fat one pot dream, throw it in and forget about it for a while.


The recipe calls for a can of potatoes, but I used fresh. This is where I get to make the mistakes so you don't have to. My potatoes weren't totally cooked in the amount of time it took for the pork to be done. (thank you microwave and plastic wrap for finishing those off for me) So if you are using fresh potatoes, you may want to boil them in some water for about 10-15 minutes before you put them in the casserole dish. Otherwise, buy a can of potatoes like the recipe calls for.


Apple Juice and sauerkraut. You really do not want to buy sauerkraut in a can, because it just tastes like the can to me.


Chop up your apples.


Slice (and boil if needed) your potatoes and layer them in the bottom of the casserole dish.


Grab some whole grain mustard, this is my favorite brand but there are plenty out there that are great.


drop that in the bowl with the apples and the sauerkraut and give it a good stir.


Layer that over the potatoes in your casserole dish.


Get your pork and add him to the fun.


Clearly you can add as many servings of pork as you'd like. You might wonder why I made so much of the potatoes and kraut when there was just one serving of pork. Well, because I LOVE potatoes and kraut. I ate them as a side dish for a couple of days. Put your casserole in the oven for about an hour. Use that hour to clean up the dishes, or just go read a book and hope your husband smells the kraut and wanders into the kitchen to ask what it is and does the dishes for you.


This smells so good you are going to be very anxious to get it out of the oven.


Talk about a delicious meal that is packed with flavor. The pork gets the flavor from all the goodness underneath it and the potatoes and apples are perfect together.

Stumble Upon Toolbar

Wednesday, September 24, 2008

Pan Fried Honey Chicken Drumsticks

While technically it is the first few days of fall, our high temperature is still 100 degrees here in AZ. I am making some hearty fall friendly meals, but concentrating on using the stove top instead of the oven. This chicken leg recipe is my favorite mix of sweet and savory, with my third favorite thing, CHEAP! Chicken legs are very affordable and very tasty.


The first thing you need are your marinade ingredients. Soy Sauce, Honey, Lemon, Sesame Seeds and dried Thyme.


I use a strainer to catch the lemon seeds so they don't end up in my marinade.


put everything in a bag and get it all combined.


The chicken I have is more from the grill pack I got that has a little bit of seasoning on it. The marinade is plenty of flavor, so don't worry about adding anything to your drumsticks.


Say goodbye to your chicken for a couple of hours and go take a walk outside. Take your dogs if you have them because they love fall weather just as much as you do.


Once you are back it is time to prepare the coating for the chicken and get cooking. I am serving this with my usual side dish, egg noodles. So I have some water boiling already as well. The first thing you need is some flour seasoned with salt and pepper.


You need some chicken broth.


Some white wine is needed also. You may notice that I have the same white wine bottle often, here is my trick. I pour the last few swallows of any bottle of white wine I may open into this bottle that I keep in my fridge. Then I always have some white wine on hand for cooking.


Butter.


Peanut oil, my favorite oil for frying.


Your chicken is ready to hop in the pan. Remember to save the marinade!


Add the butter and oil to a fry pan and get it heated up.


Dredge the chicken in the seasoned flour and shake loose any excess.


Drop the chicken in the pan and get it frying away!


It smells delicious and all the little brown bits on the bottom of the pan are going to make for a delicious sauce. Once the chicken is browned reduce the heat and let them cook for about 15 minutes, take it out of the pan and keep it warm in some foil.


Pour in the wine, the broth and the marinade and scrape up all that tasty goodness from the bottom of the pan. Let this reduce down and thicken.


Plate up your noodles or whatever side you chose. Rice or mashed potatoes would also go great with this.


The sauce can be thickened with a little cornstarch mixed in water if it is not shaping up as you'd like it to. Once it is as thick as you would like, you can plate it all up.


The legs have so much flavor and the sauce is sweet but not overly so, the soy sauce really balances it all out. You can use this same recipe for thighs as well, and you know I do love chicken thighs. I hope you are all enjoying the first few days of fall!

Stumble Upon Toolbar

Monday, September 22, 2008

Bison Macaroni Skillet

Remember Beefaroni?? I sure do, and I crave it every once in a while. This is a take on that cafeteria favorite with a little twist, I used bison instead of beef. You can use ground turkey, chicken or even fake meat crumbles to lighten it up from the usual beef.


This is from Cooking 4 Two. Lets gather up the ingredients.


Shallot


dice it up.


Red pepper


Dice that up too!


Beef or your favorite low fat beef alternative.


Elbow macaroni.


V8 juice


Hot sauce, if you want it. Of course mine is garlic!


Worcestershire sauce.

Lets get cooking!


Grab your beef or beef alternative. Get it in a skillet, season with some salt and pepper and get it broken up.


Add in the shallot and red pepper and get it stirred up and start browning.


Once your meat has browned you can add in the other ingredients. If you are using beef you will probably need to drain off the extra fat here.


Add the rest of the ingredients to the pan.


Give it a good stir. Season with a little salt and pepper at this point as well.


Cover and let it cook on low for about 20 minutes. When the noodles are cooked to your liking, it is done!


This is comfort food for fall that reminds me of being in grade school. This is a perfect dish for kids too. Not for picky husbands though, as picky husbands don't eat pasta. But that is ok, because I shared this meal with you guys, my fabulous readers!

Stumble Upon Toolbar

Saturday, September 20, 2008

Braised Chicken Thighs with Dried Apricots

Even though it is still really warm here in AZ I am going to try to put up some nice fall dishes that will warm you up, but not take too much time or effort.


The recipe calls for dried plums but I had apricots on hand, so that is what I used.


You need some white wine, dried fruit of your choice, onion and that is really about it!


I served this chicken over some egg noodles, one of my favorite things.


This chicken is from a pre-seasoned grill pack I broke up and froze. The seasoning was a citrus rub and added some nice flavor to the dish. You can add a little lemon pepper or lemon zest to your chicken if you want to add that extra layer of flavor. Be sure to season your chicken with at least some salt and pepper.


Get the chicken into a dutch oven to brown.


Pour out the wine you need for the recipe. Feel free to pour out the wine you need to reward yourself for making it through the day and have a nice drink.


Flip the chicken and make sure it browns on both sides.


Once it is browned, get it out of the pot and set it aside.


Add the onion to your pan with a little salt and pepper. It is so important to season when you add items to your dishes.


After the onion has softened, stir in the flour. This will make your sauce thicken up.


Keep stirring a minute then add the wine and get your chicken back in there. Cover it up and let it cook for 8-10 more minutes.


Stir in the apricots or other dried fruit and let them get warmed through and then you are ready to plate.


The apricots get plump and delicious and really compliment the chicken. This was filling and tasted like it took a lot more work than it actually did.


The skin was, of course, the best part.

Stumble Upon Toolbar

Thursday, September 18, 2008

Raspberry Yogurt Pastries

This is a simple dessert or snack that you can customize to your tastes. The hubby ate this as well. I guess the key to his culinary happiness is smear something on some crescent dough and serve it up!


The recipe comes from Cooking for 2 Magazine. Start by preheating your oven.


You need some crecent roll dough.


Spread it out into 2 crusts and use your fingers to seal the perforations. Pop them in the oven and keep an eye on them, they cook up quickly.


When they are done put them on a rack to cool.


The recipe calls for raspberry yogurt, but you can use whatever flavor you like.


The topping for these 'pastries' are fresh berries. I chose blackberries.


and Raspberries.


Spread the yogurt over the crusts like a sauce and then top with your fruit.


The hubby does not like blackberries, but he will eat raspberries, so this is his dessert.


I love blackberries, so I added both to mine. I also had to share some berries with my dogs because they LOVE them.


This is quick and easy and actually not that bad for you! There are a bunch of variations you could try with different yogurt flavors, I think it would be great with some vanilla yogurt and a sprinkle of good cinnamon.

Stumble Upon Toolbar

Tuesday, September 16, 2008

Pigs In a Blanket

Here is another recipe with the store bought crescent rolls and the hubby actually ate this one! Perhaps it is the familiarity of the tube that makes the stuff I make with it seem safe, who knows?

The recipe comes from an Ainsley Harriot cookbook.


Preheat your oven and lets get started.


You need some breakfast sausages.


Get them in a pan with a little oil and brown them up, meanwhile grab your other ingredients.


Reduced fat crescent rolls.


One egg. (if the hubby knew this was involved he would have never agreed to eat it, but he was outside when I was cooking. What he doesn't know...)


Dijon mustard.


Keep an eye on the pigs...


grab your dipping sauce ingredients, doesn't get much easier than that!

Remove your sausages and pop them in the freezer to cool them fast, or just leave them out if you have patience. They need to be cooled before you can proceed. trust me. hot sausage and crescent roll dough do NOT mix.


Spread out your crescents into the preformed triangles and spread with dijon.


Roll up the sausage into a nice cocoon.


Use a brush to coat the roll in the beaten egg...


make sure all the doughy parts get covered. Once they are egged, get them in the oven.


To make the sauce you just add the horseradish to the ketchup...


and give it a stir. so easy!


These are so delicious and would also work great at breakfast time. The sauce has a nice kick and the dijon in the 'blanket' adds a nice complexity.

Stumble Upon Toolbar

Saturday, September 13, 2008

Cold Vegetable Pizza from Cooking For 2 Magazine

I know a lot of people try and guess which of the meals the hubby might have actually ate or tried. This is one of the ones he tried and said that the next time I made it he would have some!


I have been making a couple of things with those refrigerator crescent rolls lately so I will feature those this week. I think that Sandra Lee from the food network is a tad wacky but she does have a pretty good message, use some of the convenience items from the store. SOME. I will come to your house and smack your hand if you buy that pre-minced garlic nonsense in the jar or, god forbid, those plastic citrus shaped juice dispensers. Ok, enough ranting, preheat your oven to 375 degrees.


I was excited to find they have a reduced fat version of these since I had a few recipes to try with them.


spread it out on a cookie sheet and use your fingers to squish together all the perforations and to make a little crust around the edge. pop it in the oven and lets prep the rest of the ingredients.


grab some cream cheese and mayo, and whatever vegetable toppings you want. This is a great way to use up leftover veggies.


I chopped up black olive, red pepper and green onions.


get your dough out of the oven and on to a cooling rack. I overcooked my dough a little so keep an eye on yours!


You really can't go wrong with something that has cream cheese and mayo smeared all over it.


Get the cream cheese and mayo in a bowl with some dill.


If you actually wait for your cream cheese to soften and cool this step is a lot easier, but I have no patience for something like that!


spread the mixture on the dough.


sprinkle it with a little bit of cheesy goodness.


spread your toppings on and then say good bye for a while...


Goodbye!! (yes I rant and rave about YOU guys not using plastic butter, but do you think I can get the hubby to listen?? no way. plastic butter right next to a can of plastic nacho cheese.)


After it has chilled you are ready to eat!!


This would make a delicious appetizer as well, just cut it into nice bite sized triangles. I loved this and so did the hubby, so give it a try!

Stumble Upon Toolbar

Wednesday, September 10, 2008

Chicken Paella

Paella is a Spanish rice dish traditionally prepared in a Paella pan that is large, round and shallow with 2 handles. You can make it just as easily in a normal frying pan.


The recipe calls for ham but I didn't use any. You can also add some seafood if you want or make it vegetarian with some meat substitute and veggie broth.


Grab your ingredients you need to get started.


This recipe uses arborio rice, which is normally used in risotto. It works very well in paella though.


some garlic that we will run through the press or you can just mince it up.


some chopped onion.


some red peppers sliced up.


and your chicken cubed up.


add the veggies and chicken to a pan with some olive oil and stir it up over medium-high heat until the chicken browns.


This will only take a few minutes, in the meantime grab your other ingredients.


Some frozen peas will go in later, but get those out to defrost.


Turmeric, cumin and some chicken broth.


When the chicken is browned get it out of the pan.


And in with the rice.


toast it up until it is lightly browned, keep an eye on it and keep stirring as it will go from good to burnt kind of quickly.


Pour the broth and spices in and add back the chicken and veggies.


Reduce the heat to medium-low, cover it and simmer for about 30-35 minutes


Take off the lid and stir in the peas, cook until the peas are heated through, about 2 minutes and you are ready to eat!!


This is comfort food for sure and perfect for a nice fall evening. This is very versatile and a great way to use up leftovers from the fridge, so experiment and make it with whatever you'd like.

Stumble Upon Toolbar

Saturday, September 6, 2008

Grilled Curry Salmon with Macaroni Salad

You still have time to get out there and grill and enjoy the last days of summer. This meal is a great summertime dinner that comes together easily so you aren't slaving in the kitchen.


The salmon has to chill out in the fridge with the rub and marinade so get that started first.


I am used salmon with the skin still on for the first time and I may never go back, but we will talk about that more later.


The rub is simple, lemon pepper, garlic powder and curry powder.


Get it on your salmon and wrap it up and put it in the fridge for a half hour.


While that is getting infused with flavor we are going to create our marinade that is going to boost the taste even more. You need some worcestershire sauce, soy sauce and a little liquid smoke if you've got some.


Mix that up with a little butter that you zap in the microwave for a few seconds to get it melted. Set that aside and lets start our side dish.


I love macaroni salad. This recipe is simple and so tasty. Get some water boiling for the pasta.


Start prepping your veggies. You need some celery, red pepper, onion and pimentos.


Chop them up and set them aside.


Get your macaroni measured...


And throw them into the hot tub.

It should be about time to put the salmon in the marinade.


Pour the marinade in a bag with the salmon.


Get it back in the fridge for another half hour.


Drain your pasta when it is done and rinse with cool water. Get it in a bowl and sprinkle with a little bit of salt.


Use your strainer to defrost some frozen peas by running some cool water over them.


Combine all of your veggies and noodles in a bowl.


Then here comes the big flavor punches, mayo and cheese. The recipe calls for chunks of cheddar, but this shredded worked just fine.


mmm cheese


You can use as much or as little mayo as you like.


Stir it all up and put it in the fridge to chill until your salmon is grilled up.


Pull the salmon out of the marinade and grill it up for just a few minutes. I like mine a little raw in the middle but you cook yours to your liking.


Plate it all up and enjoy! The salmon skin gets so crispy and delicious when you grill it, I have never had it before but I am hooked. The skin also helps the salmon maintain moisture.


The macaroni salad was fabulous as well.

Have a great weekend!!!

Stumble Upon Toolbar

Thursday, September 4, 2008

Creamy Shrimp Rolls

First of all, thanks for all the new readers who checked me out from my other blog. I also want to thank all of my readers for the wonderful comments. I appreciate each and every one of them and I appreciate you taking a few minutes out of your day to check out my blog so I am not 'Dining Alone!'.

As summer comes to an end for most of you I wanted to offer up one of my favorite summer sandwiches, Shrimp Rolls. You may be familiar with Lobster Rolls but lobster meat isn't nearly as easy to come by (or as cheap) as frozen shrimp. I made variations of this but found a good recipe in the magazine Real Simple.


Easy side dish, chips!


You need some frozen cooked shrimp. I defrost mine in a bowl of cool water while I prep the rest of the ingredients.


I have been using the Debbie Meyer green bags for a few weeks and I am a big fan. They may not save me a ton of money but they really save me a ton of grief of not having to be upset when I go to use an ingredient and it is rotten.


You need a regular old hot dog bun.


You want some kind of green on the bun, I chose spinach.


Line the bun with the spinach and you are nearly done!


Chop up your celery.


Chop up your shrimp.


Add them together in a bowl.


I like to use french grey salt in simple dishes like this, but kosher or sea salt is fine also.


Add in some lemon juice


I ran out of my beloved vegenaise and as we have been trying to save gas I haven't got to the specialty market that carries it. I am using good old Best Foods. Add this in with the rest of your ingredients and give it a stir. I missed getting a picture at this point because I was hungry and it looked and smelled delicious.


This is a perfect lunch for a late summer weekend and you won't spend a lot of time in the kitchen cooking. Have a great weekend!!

Stumble Upon Toolbar

Monday, September 1, 2008

Beef Chili Stew

For most of my awesome readers the weather is going to start cooling off. We will still be suffering through 2 more months of 100+ degree weather here, but soon it will be beautiful again. Even though it is hot, I get cravings for chili all of the time. This one will be great for this time of year if you have some fresh corn (my sister has tons) and beans to use. I don't but don't let that stop YOU!


This is another recipe from Cooking Thin with Chef Kathleen, lets get started.


I am using regular onion and not shallots for this one.


Dice it up.


You will need some tomatoes and chili powder. Use those fresh garden tomatoes if you have them. (you can see the veggies in the background that I chopped for the hubby's taco dinner and his hot sauce, he wouldn't even try this chili!)


Some stew beef is needed also. If you want to do this vegetarian some fake steak strips or veggie crumbles will work. Season the meat with some salt and pepper.


Get some olive oil heating in a nice heavy pot.


Toss in the meat and get it browning.


At this point I almost broke my neck as the smell of browning beef means 2 terriers drooling at my feet creating one slippery floor. I managed to catch myself before I fell on the dogs.


I regained composure and added in the chili powder and the onion and let it cook for about 10 minutes.


Right about now it should be smelling really good in your kitchen.


Add in the tomatoes.


Give it a stir and simmer for 30 minutes. (If you were using fresh veggies you would want to add those in prior to the 30 minute simmer, but since I am using Frozen...)


They will go in toward the end.


Stir them in and add some more salt and pepper...


And let it hang out until the veggies are heated through.


This is a fun change to your regular old beans and beef chili.

Stumble Upon Toolbar